


Record your Windows 11 screen Can be done using tools available in the system by using Snipping Tool When you want to select the screen area or use Xbox Game Bar For games and apps that support If you want to record with sound, check both the computer’s audio and microphone before starting, because they are separate settings
This guide helps you choose the recording method, start and stop recording, find the video file, and troubleshoot common issues such as no sound after recording or a gray record button without having to install additional screen recording software
Recording your Windows 11 screen: which method should you use?
Start from what you want to show in the clip. If you want to teach by clicking menus, opening folders, or working across windows, start with Snipping Tool. Game Bar is better for capturing game or app activities that support it
| What you need | Recommended starting tools | Points to check |
|---|---|---|
| Select specific screen area to record a tutorial clip | Snipping Tool | Set the screen area and audio source before pressing Start |
| Record games or apps with keyboard shortcuts | Xbox Game Bar | Does the app support recording? |
| Record with voiceover explanation | Either method, depending on the app version | Select the correct microphone and verify access |
| Record the desktop or steps in File Explorer | Start with Snipping Tool | Game Bar has limitations with these screens |
Common keyboard shortcuts are Windows + Shift + R to open video-recording mode in Snipping Tool, Windows + G to open Game Bar and Windows + Alt + R To start or stop recording in apps supported by Game Bar, do not confuse with Windows + Shift + S which uses still image capture
How to record your screen with Snipping Tool
Snipping Tool can be opened from the Start menu by typing the app name. If the keyboard shortcut does not work, try opening it this way first to determine if the issue is with the keyboard shortcut or the app
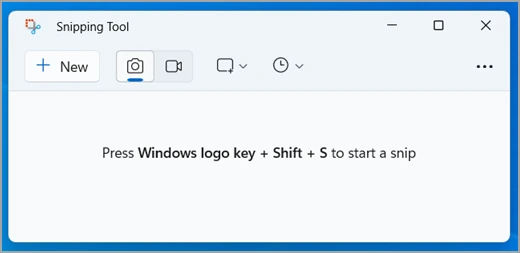
Select video mode and the area to record
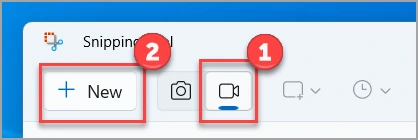
- Open Snipping Tool Then select the video camera icon or mode Record
- Select New or open the recording bar with Windows + Shift + R
- Drag the frame that you want to record, and ensure that the menu or window you want to demonstrate is inside the frame
- Check the audio options in the recording bar and select Start
- Perform the steps you want to demonstrate, then press Stop When done
Before starting a long recording, it is recommended to record a short sample, then play it once to check that the frame does not cut important parts, the text is readable, and there is no personal information included in the video. The presence of a timer does not confirm that the audio has been fully recorded
Note: if Snipping Tool on your PC windows 10 only supports screenshots. To record video, you need windows 11 only. We recommend using Xbox Game Bar (Windows + G ) instead. If you also want to show the taskbar, you can use this method. OBS Studio
Turn on the computer audio and microphone to match the clip
Computer audio Refers to the audio from the program or media currently playing, while Microphone audio Refers to the speech received from the microphone. If you want to teach a task with a voiceover Check that the correct microphone is selected It’s not just about turning up the speaker volume
Supported versions of Snipping Tool have system audio and microphone options before starting the recording. Some versions also allow selecting audio devices. If you do not see the options as shown in the example, check for app updates from the Microsoft Store as usual; it is not necessary to join the Windows Insider program to follow this guide.
Stop recording and check the video before closing the app
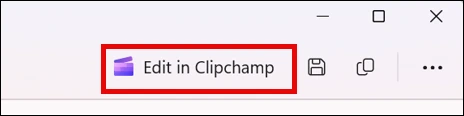
After stopping recording, play the video to check the beginning and the sections with spoken audio. Then verify that the file is in the actual folder. If you need to name the file or choose where to save it, use the Record or Save as button available in the app version. Edit in Clipchamp is an option for editing, but it is not a mandatory step before using the file.
How to record games or apps using Xbox Game Bar
Game Bar records supported games and apps, but it should not be used as the sole solution for recording everything on your computer, especially for tutorials that require moving across Desktop and File Explorer.
- Open the target game or app, then click to make that window the active window
- Press Windows + G To open Game Bar and view the panel Capture
- Check the microphone button. To change the audio being recorded, see Settings > Capturing and the Audio to record option as displayed on the device
- Press Windows + Alt + R To start recording, or use the Record button in the Capture panel
- Press the same shortcut again to stop. To turn the microphone on or off while recording, use Windows + Alt + M
If you want to combine audio from the program and system, check the audio group option, such as All Then record a sample to test first. Do not assume that just because the microphone is enabled, the audio from the program will be captured.
Where is the video file after recording the screen?
These two tools do not use the same folder by default. Simply remembering that ‘the file is in Videos’ may cause you to not find it. Try to check separately based on the app used for recording as follows:
| Tools | Location according to documentation | If not found |
|---|---|---|
| Snipping Tool (version with automatic recording) | Videos > Screen Recordings | Check the app’s Settings to see if automatic recording is disabled or if the folder has been changed |
| Xbox Game Bar | Videos > Captures (files are MP4) | Open ‘Show all captures’ or ‘Gallery’ and check the file and its storage location |
| Select ‘Save as’ yourself | The folder selected during recording | Check the filename and location in the Save dialog. Do not assume it is always in the default folder. |
If the system uses Thai folder names or has moved the file storage location, the name and path may not match the example. Before deleting the original or closing the demonstration window, ensure the clip can be played.
How to fix Windows 11 screen recording without sound
Start by opening the video recorded with the file player program, then separate the missing audio into speech, program audio, or both. This will help you fix the issue more precisely before immediately reinstalling the driver.
- No speech audio: Check the tool’s microphone button, the mute button on the headphones, and the selected microphone. If there are multiple, be careful that the app selects a different microphone than the one being used for speaking.
- No audio from the program: Verify that the program is actually outputting audio and select the desired audio recording or audio group, not just the microphone.
- App cannot access microphone: Go to Settings > Privacy & security > Microphone Then check permissions for that app. You do not need to grant access to every app.
- Uncertain if the microphone is working: Check Settings > System > Sound > Input Select the microphone to use and then test the audio before re-recording.
Change one thing at a time and record another short clip to compare. Only if the computer cannot detect any audio device should you check How to check and update to the correct driver version Installing drivers is not a step that everyone must do to start recording the screen.
Cannot record: No record button or the screen is black.
Snipping Tool does not have a video option
Check that you are running Snipping Tool on Windows 11 And select the correct video mode, then check for updates in the Microsoft Store. If the device is managed by an organization, there may be app or update restrictions. You should ask the administrator before changing the settings.
Game Bar opens, but the record button does not work
Opening the Game Bar successfully does not mean the current window supports recording. Check if you are on the Desktop, File Explorer, or an unsupported app. If you want to record that area, switch to selecting the area with Snipping Tool instead.
Captured some content appears black
Some apps or content have recording protections, so it should not be concluded that it is a driver issue in every case. Try recording a general app without sensitive information to isolate the symptoms first. This guide does not cover bypassing content protection systems.
What else to check before sending the clip to others
- Ensure the video and audio match what you want to convey without unintended background noise
- Check the account name, email, notifications, documents, and any codes that may appear in the frame. If there is personal information, edit the clip or re-record before sharing
- Send a sample file or open the file from its actual saved folder to confirm you have more than just a Preview window.
If you just installed the system and haven’t set up language, time, or devices properly, you can check Post-installation settings It can be done. For screen recording, start with a short test clip that works, then proceed to record the longer actual work
Source and scope of this guide
Compiled from manufacturer documents and verified on October 29, 2026. Audio and video have not been tested on every build; therefore, no maximum frame rate or guaranteed resolution is specified for all devices.
- Microsoft Support: Using Snipping Tool and Video Mode
- Microsoft: Keyboard shortcuts, microphone settings, and file location for Snipping Tool
- Microsoft: Adding sound and microphone for recording with Snipping Tool
- Microsoft Support: Recording apps and games with Xbox Game Bar
- Microsoft Support: Microphone access permissions
- Dell Support: Limitations on recording apps with Game Bar

Comments